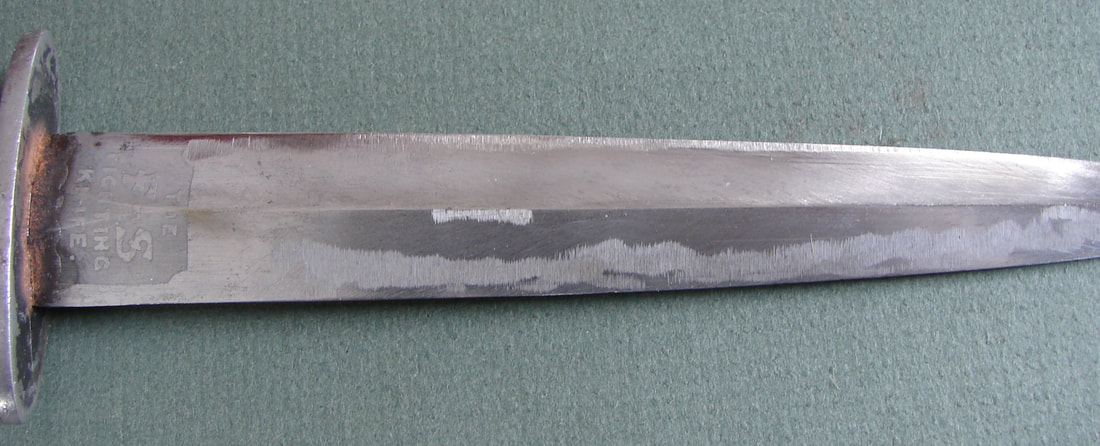
I get a lot of emails asking what a knife is worth, in all sort of conditions from excavated to near pristine. The other week on Ebay I bought a fairly scarce Wilkinson Sword Co. Second Pattern "Button Hilt." I got it really cheap because some flaming moron used and electric grinder to try to sharpen it.Unfortunately this is not my first blog on a good knife nearly ruined.
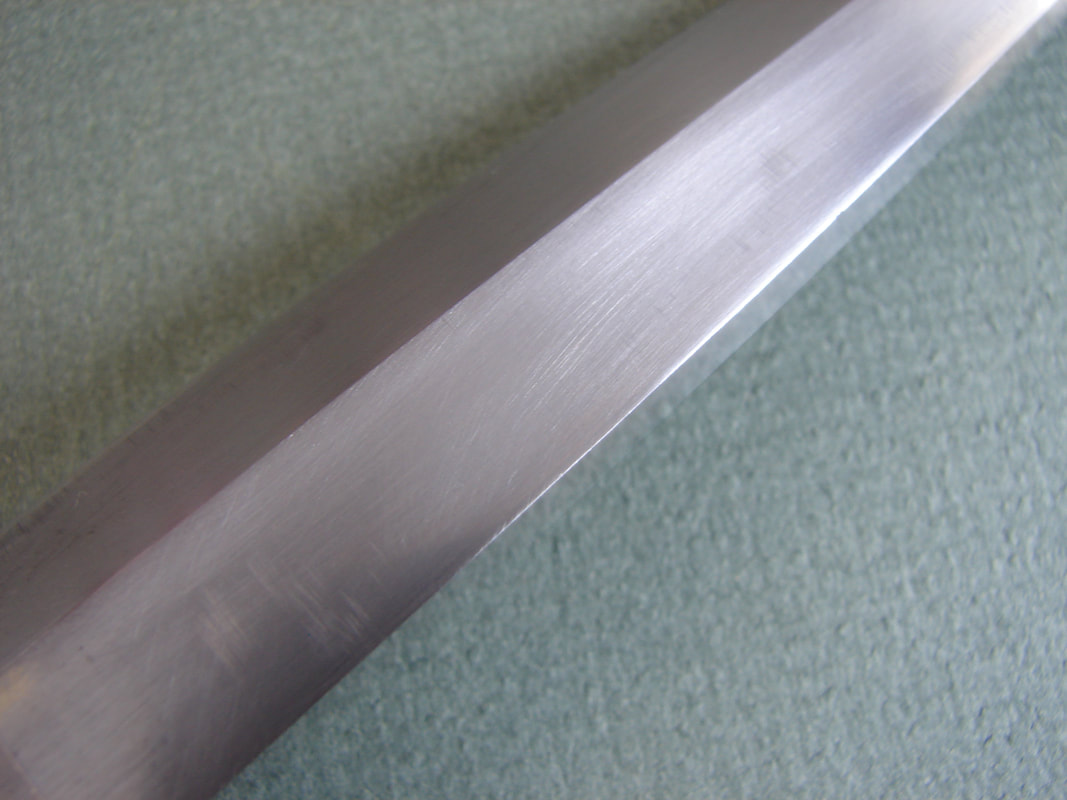
First let me explain the F-S was never intended to be used like a Japanese Chef's knife. It will not slice paper-thin pieces of fish or vegetables. It was made to kill people! So the blade geometry is rather poor for holding razor sharp edges. The steep bevels that make it rugged also preclude it from taking a fine edge. It also means the blade does not, I REPEAT DOES NOT fit in the knife grinder on the back of your wife's damned electric can opener! If you even approach an electric grinder with an original WW-II F-S I hope the skies open up and a bolt of lightning flies up your... well I think you get the message. Here is the condition the blade was in, on both sides, when I bought it. I used to build custom rifles and my teacher told me "you never get rid of all of the scratches. You just try to make them as small as possible and all going in the same direction."
First let me explain the F-S was never intended to be used like a Japanese Chef's knife. It will not slice paper-thin pieces of fish or vegetables. It was made to kill people! So the blade geometry is rather poor for holding razor sharp edges. The steep bevels that make it rugged also preclude it from taking a fine edge. It also means the blade does not, I REPEAT DOES NOT fit in the knife grinder on the back of your wife's damned electric can opener! If you even approach an electric grinder with an original WW-II F-S I hope the skies open up and a bolt of lightning flies up your... well I think you get the message. Here is the condition the blade was in, on both sides, when I bought it. I used to build custom rifles and my teacher told me "you never get rid of all of the scratches. You just try to make them as small as possible and all going in the same direction."
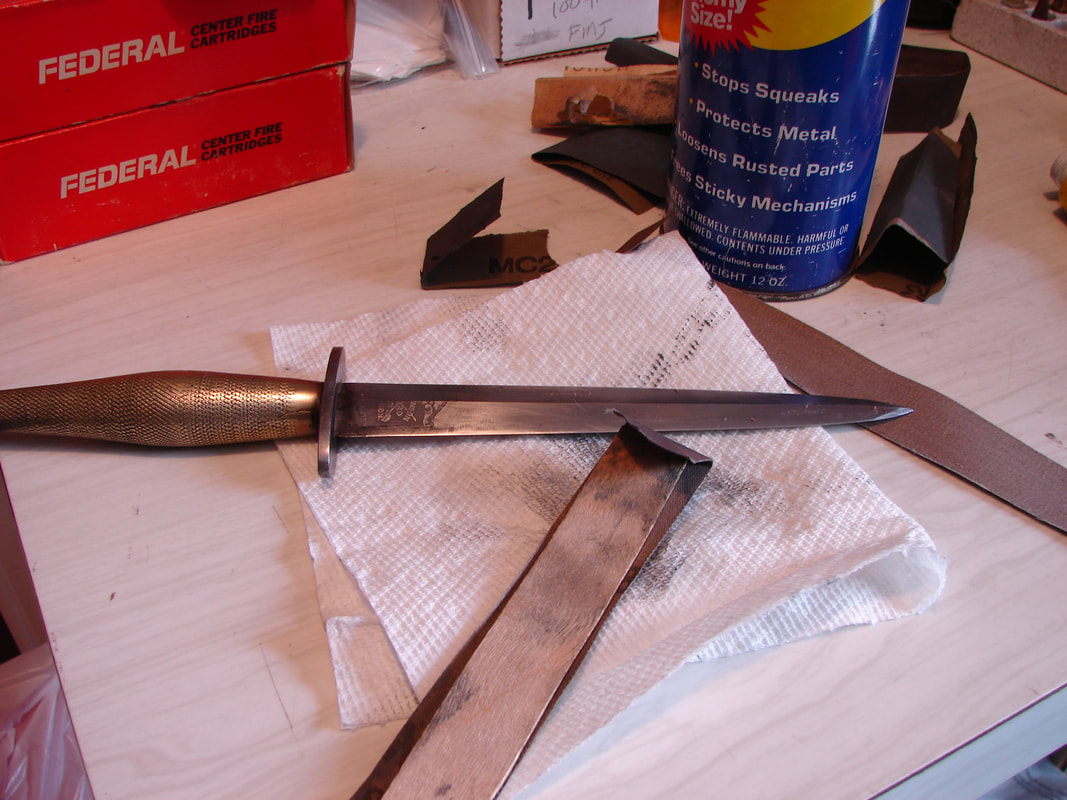
Some purists will probably feint when I start talking about abrasives and elbow grease to clean up the blade. This is when you have to decide when to, and when not to, try restorations. I suggest you buy a really ratty 3rd pattern for a few bucks and practice what I am going to show you. The supplies you will need are inexpensive and easily acquired. They are an assortment of wet/dry abrasives, a flat piece of thin wood, and a lubricant. I started on this knife with a 220 grit paper. Where you starts is determined by how deep the marks are. I finished off with old worn-out 400 grit paper. I used a tongue depressor for my "backer," and WD40 for my lubricant. (I took the following photos after I had already finished polishing the blade.)
Using the wooden backer is essential to keeping the blade's bevels flat, and the median ridge (line down the center of the blade) crisp and straight. You must also hold the abrasive flat on the blade and not rock it back and forth or you will round off the centerline, ruining the original factory profile. Use plenty of lubricant so the abrasive cuts better and lasts longer. As it wears down grab a new piece. I suggest running the abrasive paper at a 45 degree angle down the blade so that you are running across the ugly grind marks. Work each flat until you need to switch to a finer grade/grit paper. When in doubt start with a fine paper. If it is too fine it will not harm anything, just make the work go slower. If it is going way too slow, change to something more aggressive, then work back to finer paper as you progress. Here is my progress after about 1/2 hour with 220 grit paper. A lot of the grinder marks are still visible.
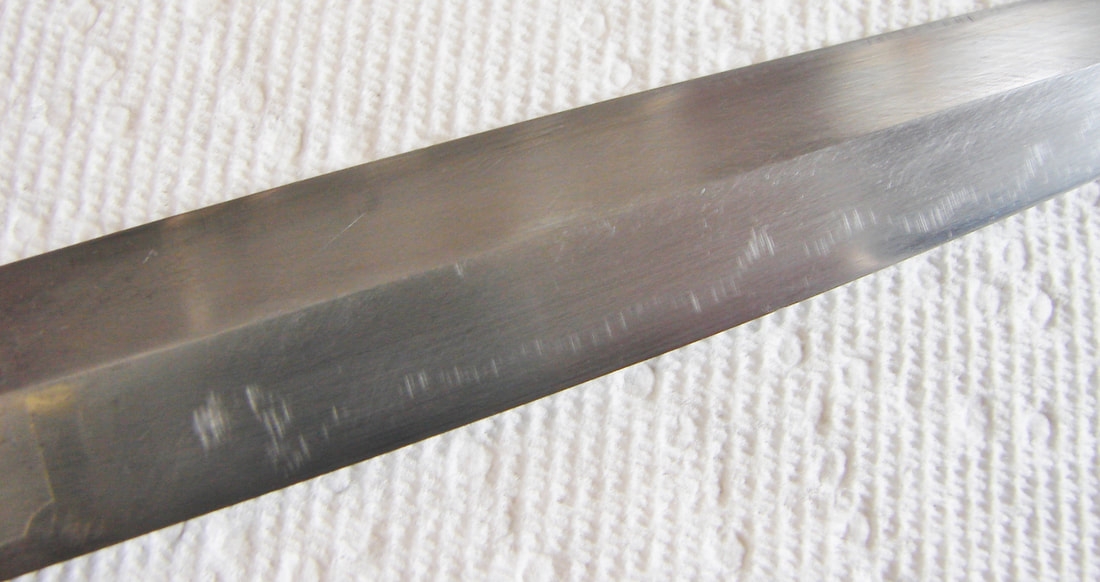
Next I switched to some fresh 400 grit for about another 20 minutes and then to some worn down 400 grit. All the time I kept the blade wet with WD40. Luckily the moron with the grinder mostly stayed away from the etched logos.
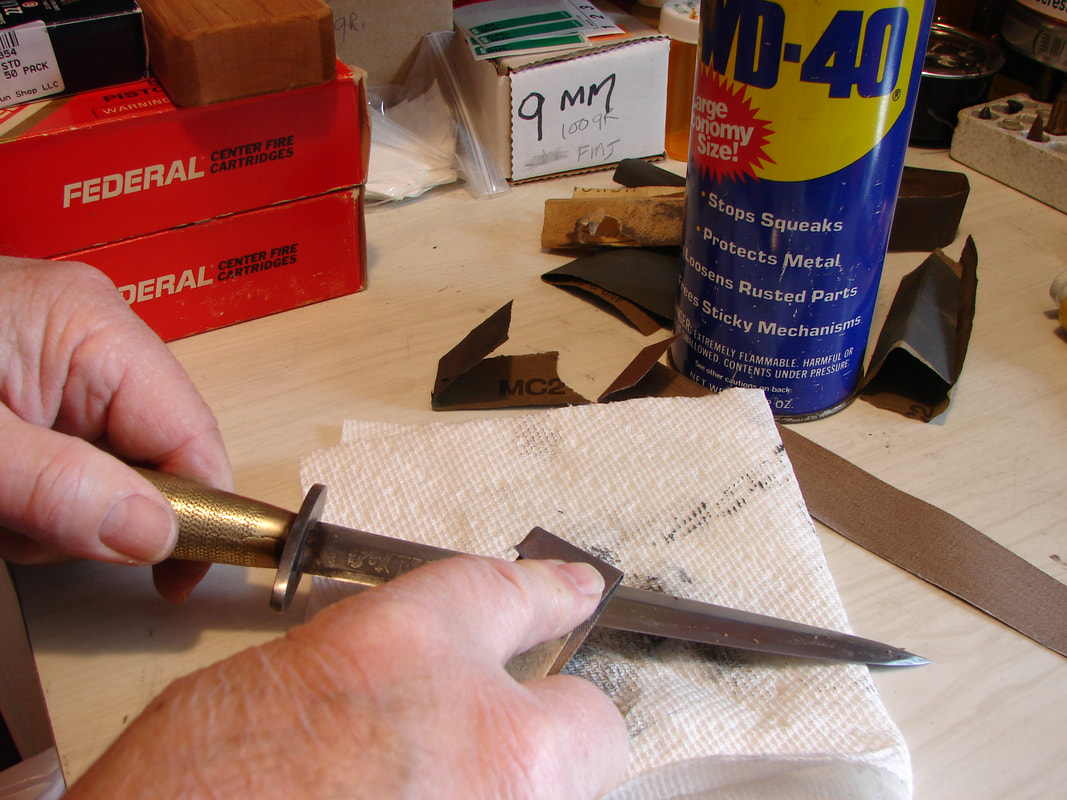
I should warn you that as you are removing the scratches you are also sharpening the blade. So be very careful or you may end up with a nasty cut. If the idiot who owned the knife before me had resorted to this method, instead of a grinder, he would have ended up with a very sharp knife without causing any damage. Here is where i finally decided to stop. I could have gone finer but remember we are trying to restore it to a near "original polish" not some mirror polish. Later, if you decide to, you can always go a little further. I decided I could live with this finish compared to how it looked on arrival.
Just be sure to practice on an old beater of a knife and if it doesn't seem to work out for you then do not ruin a better knife hoping you will perfect your skill. Leave that to the morons.
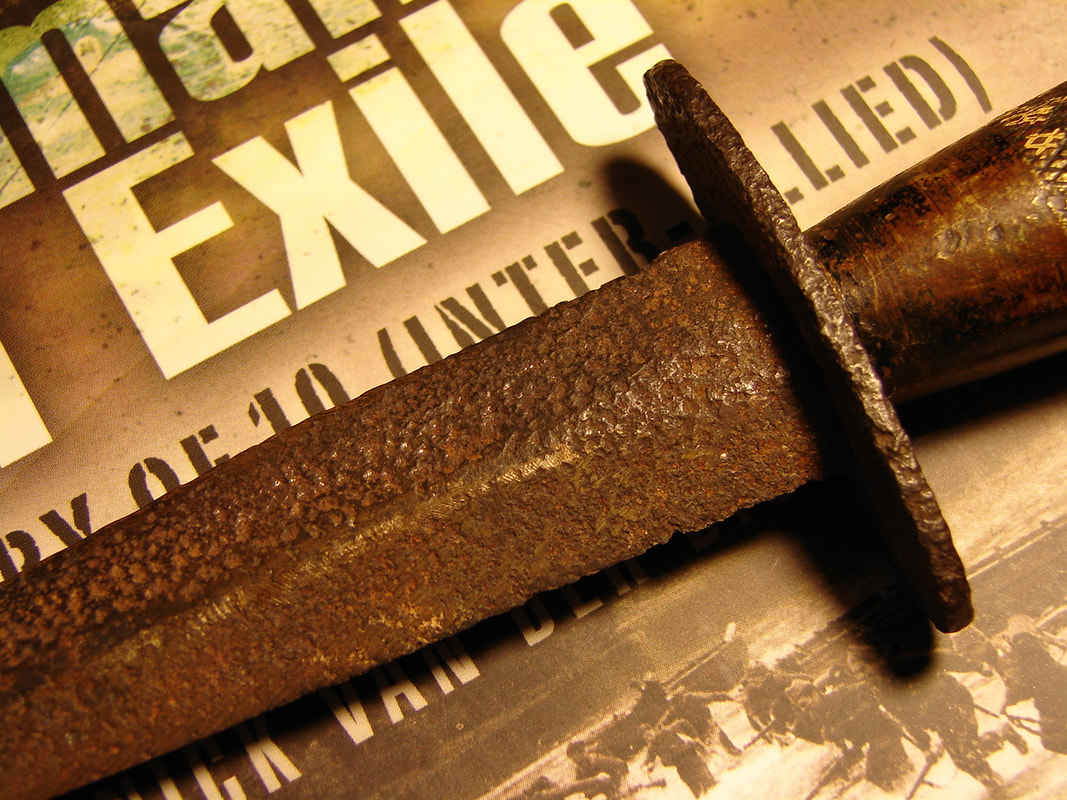
A NOTE: Do not try this technique on a truly relic condition knife because it will only ruin any value it had. For example this knife unearthed at the beaches of Dieppe.
A NOTE: Do not try this technique on a truly relic condition knife because it will only ruin any value it had. For example this knife unearthed at the beaches of Dieppe.

 RSS Feed
